


A Touch of Claridy
Discover Radiant Beauty at A Touch of Claridy Indianapolis
How To Tint Eyebrows At Home
How to Tint Eyebrows at Home: A Pro's Guide
You're probably here because filling in your brows every morning is getting old.
Maybe you want more definition, but you don't want brows that look stamped on. Maybe you've thought about tinting them yourself, then stopped because the risks felt real. Too dark. Stained skin. Irritation near the eyes. Those concerns are valid, especially if you already deal with sensitive skin or use corrective skincare products.
At-home brow tinting can work well when you treat it like a precise service, not a casual beauty shortcut. That's why the best approach is simple, controlled, and safety-first. Eyebrow tinting has a long history, tracing back to ancient Egypt around 3500 BCE, and the modern eyebrow tinting market was valued at $250 million in 2025, with 65% of consumers preferring DIY methods for convenience, according to this eyebrow tinting market overview.
If you're in Greenwood, Indiana, Indianapolis, or nearby and want to understand how to tint eyebrows at home without guessing, this guide is built for first-timers. It's practical, direct, and focused on what creates natural-looking results while protecting the skin underneath.
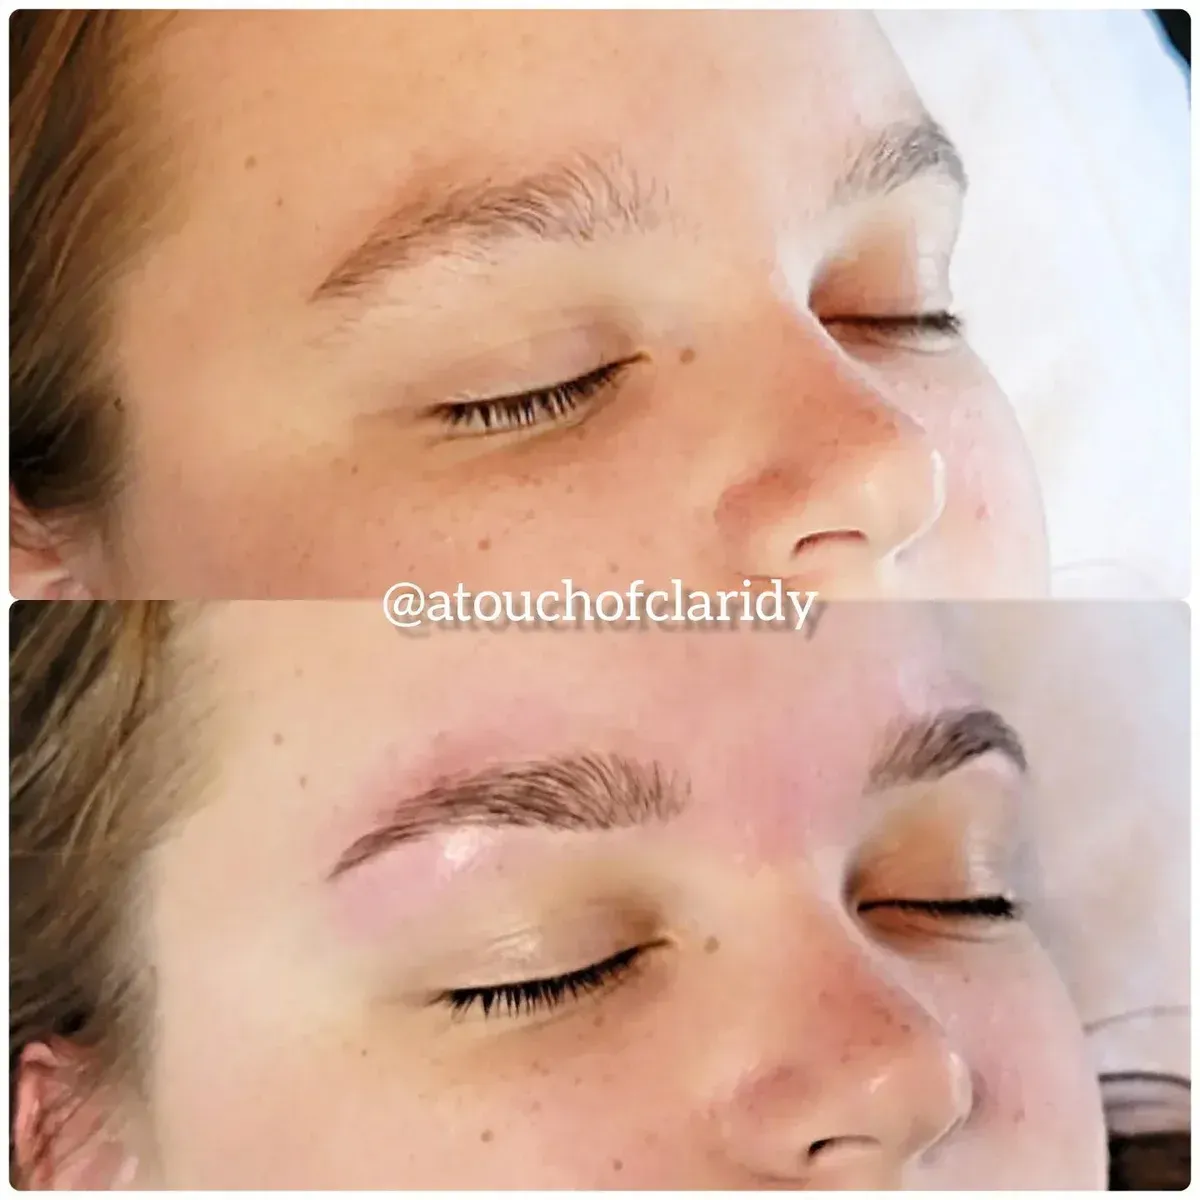
Dreaming of Fuller Brows Without the Daily Fuss
If your brows disappear without makeup, tinting can make a visible difference without changing your face. It doesn't add hair, but it can make the brow you already have look more defined, softer, and more balanced. That's why so many people turn to it when pencils and tinted gels start to feel like a daily chore.
The appeal is easy to understand. You want brows that still look like your brows, just better. Not heavier. Not harsher. Not overly warm or too deep for your skin tone.
That's also where many DIY attempts go wrong. Most mistakes come from rushing the prep, choosing a color that's too dark, or treating processing time like a suggestion instead of a hard stop. Brow tint sits close to delicate skin, so precision matters.
Practical rule:The most natural brow tint rarely comes from the darkest option in the box. It comes from restraint.
For readers in Greenwood and the Indianapolis area, this matters even more if you're already investing in skin health. Reactive skin, exfoliating products, and corrective treatments can change how your skin responds around the brow area. A safe tinting routine should support your overall skincare, not fight against it.
Choosing Your Tools and Perfect Tint Color
The cleanest home brow tints start with restraint. Better tools give you better control, and better control is what keeps brows looking softly defined instead of flat, overly dark, or stained onto the skin.
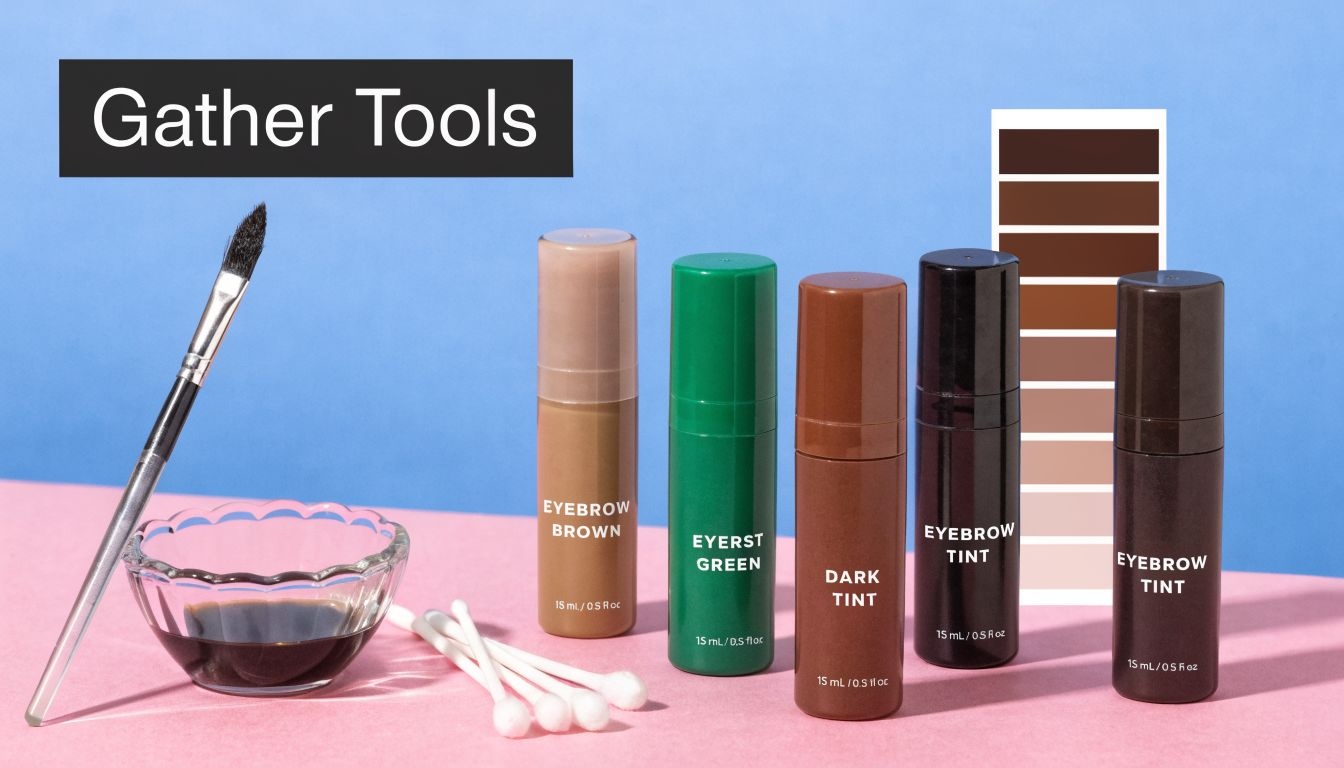
What you need before you start
Use a brow-specific tint kit. Standard scalp hair dye is too aggressive for the brow area and too risky this close to the eyes.
Set out your supplies before you mix anything:
• Eyebrow tint kit with the intended developer
• Small mixing dish for a controlled, fresh batch
• Angled brush or spooliefor precise placement through the brow hairs
• Petroleum jellyto outline the brow and limit skin staining
• Oil-free cleanser or micellar water to remove makeup, sunscreen, and oil residue
• Cotton buds and damp cotton pads for quick corrections
• Timer so processing stays consistent from one brow to the other
A rushed setup leads to the mistakes I see most often. Tint sitting too long on one brow, messy edges, and color grabbing patchily because the tools were an afterthought. If you want to compare brow-related options before buying, review the A Touch of Claridy service and product list.
How to choose a shade that looks natural
Shade selection matters more than brand for a first-time result. The safest starting point is usually one to two levels lighter than the brow color you think you need. Fresh tint reads darker at first, and the skin under sparse areas can hold color for a short time, which makes the whole brow look deeper.
That trade-off catches beginners. Going darker sounds like it will create fullness, but it often creates hardness instead. A slightly lighter neutral shade gives definition while still leaving room to build confidence and adjust next time.
Use this quick guide:
Hair or brow depth
Better beginner choice
Why it works
Light to dark blonde
Soft taupe or light brown
Adds shape without turning orange or looking drawn on
Medium brown hair
Light to medium brown
Keeps the brow visible but balanced
Deep brown hair
Medium brown or soft dark brown
Defines the shape without making the front look boxy
Sparse brows
Neutral brown, not extra dark
Reduces the chance of obvious skin staining
Undertone matters too. If your hair pulls warm, resist the urge to choose the warmest brown in the kit. In brow work, too much warmth can read brassy against the skin, especially in natural daylight. Neutral or soft ash-brown shades usually give a more believable result.
If you are between two shades, choose the lighter one for your first application. It is easier to deepen a brow on a later session than to fade an overly dark tint while protecting sensitive skin.
The Critical Pre-Tint Preparation Steps
A good brow tint can still go wrong before the product ever touches the hair. In my treatment room, patchy results and irritated skin usually trace back to rushed prep, not the tint itself.
If you have sensitive skin, rosacea, eczema, recent breakouts near the brow, or you use retinoids, acids, or acne medication, slow down here. Those details change how the skin reacts and how safely you can tint at home.
Patch testing is required
Do a48-hour patch testwith the exact tint mixture you plan to use.
Apply a small amount to clean skin on the inner arm or behind the ear, then leave it alone and check the area over the next two days. Redness that lingers, itching, swelling, burning, or a rash means the product is not a safe match for your skin.
This matters even if you have tinted your hair before. Brow products sit close to the eyes, and the skin around the brow can be more reactive than the scalp. Clients are often surprised by that.
If you are using prescription acne products, exfoliating acids, tretinoin, or strong brightening products around the forehead and eye area, wait until the skin is calm and intact. Tint on compromised skin can sting, stain unevenly, and leave you with more irritation than definition.
Prep the brow area with control
Once your patch test is clear, set up the skin and brow hairs so the tint grabs evenly.
Use this order:
• Cleanse the brow area wellwith an oil-free cleanser or micellar water to remove sunscreen, makeup, skin care, and brow wax.
• Dry the skin and hairs fullybecause leftover moisture can dilute the tint and make the result inconsistent.
• Brush the brows into their natural directionso you can see the true shape and sparse areas before you apply anything.
• Apply a very thin layer of petroleum jelly around the brow shape, staying slightly outside the hairs, to limit accidental skin staining.
• Keep barrier product off the brow hairsor you will block the tint from depositing where you want fullness.
The spacing matters. Bring the barrier too close and you clip the shape. Place it too far out and it does not protect the skin where beginners usually drift.
If you already get your brows professionally shaped or want a reference for what a clean brow area should look like before tinting, review this waxing and tinting service in Indianapolis.
One more safety point. Do not tint right after waxing, threading, dermaplaning, or exfoliating the brow area. Freshly treated skin is more likely to sting and hold unwanted stain.
Clean skin gives cleaner color. Residue from moisturizer, SPF, facial oil, or brow gel can leave you with uneven uptake, darker spots on the skin, or areas where the tint barely grabs at all.
Applying Eyebrow Tint for Natural Results
Good brow tinting looks controlled, not painted on. The goal is more visible definition through the hairs, with only minimal skin staining to support shape.
Start with a visual guide if you learn best by seeing the process laid out:
•
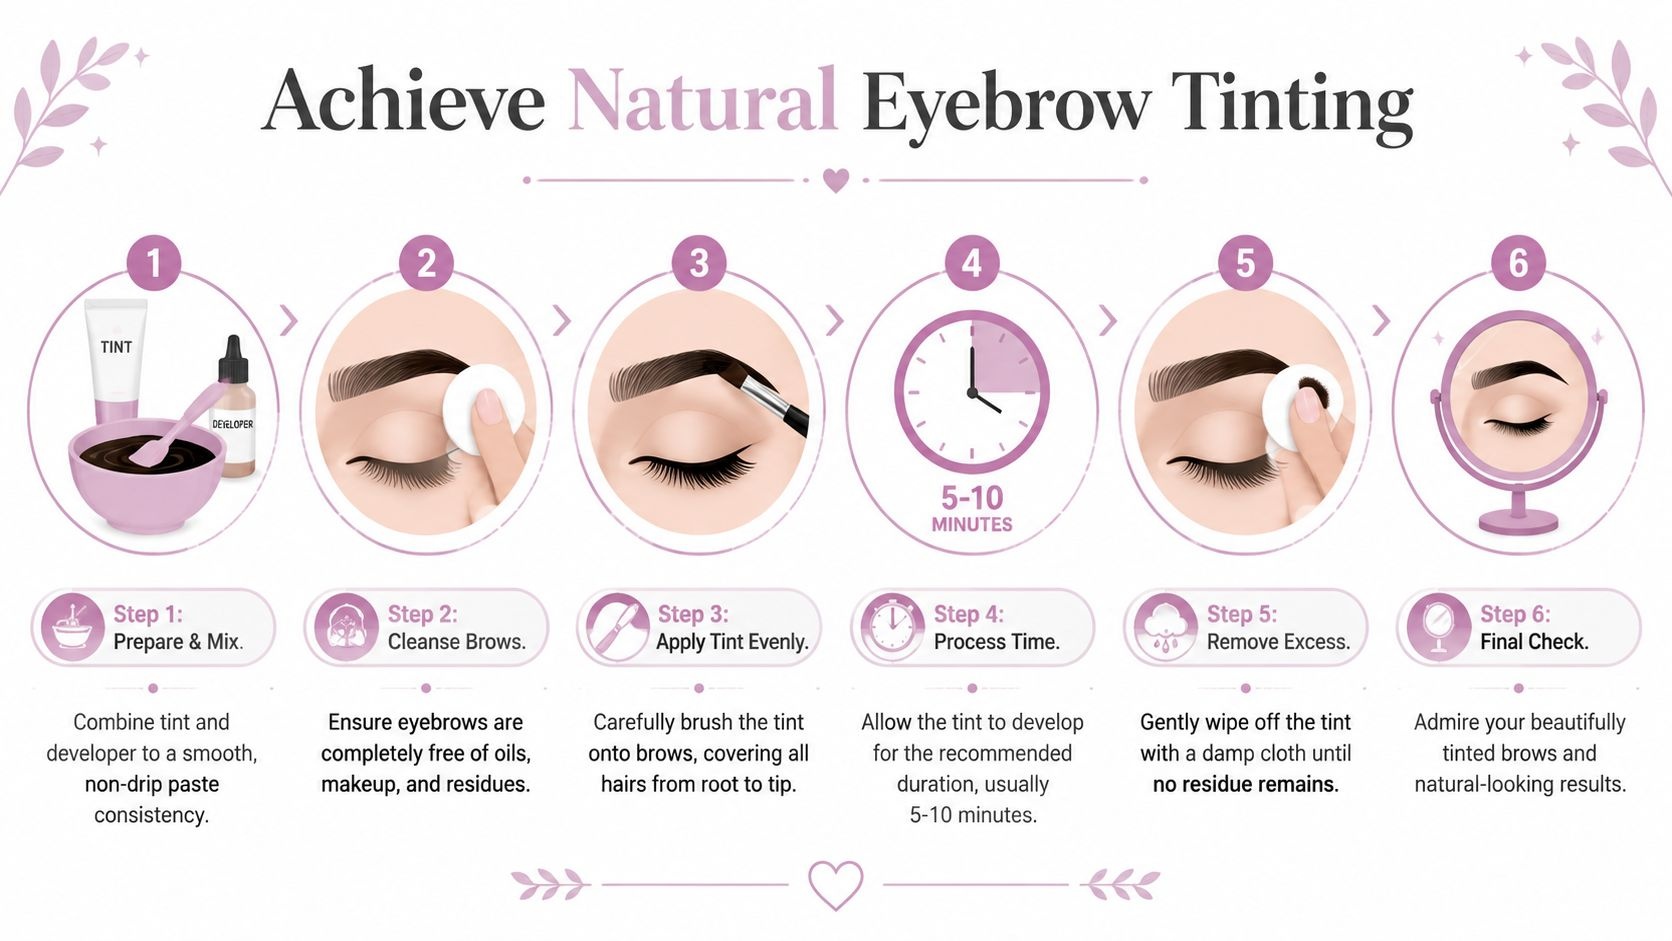
Mix and map before you apply
Mix the tint exactly as your kit directs until it forms a smooth, creamy consistency. Product that is too thin tends to spread past the brow line and stain skin unevenly, which is a common problem for beginners.
Keep your shape conservative. Follow the brow you already have instead of trying to build a brand-new arch with tint alone. On sensitive skin, overextending the shape usually leaves the most obvious stain at the tail and under the front.
A clean application sequence that works
A sectional approach gives the most natural result at home. Apply through the middle and tail first, then finish at the front. A step-by-step brow tinting method associates that order with more even results and notes that leftover oil is a frequent cause of tint failure.
Use short, light strokes and watch where the product is landing.
• Start in the body and tailbecause those areas can usually carry a little more depth without looking harsh.
• Apply less product at the frontso the inner brow stays soft.
• Press enough to coat the hairsbut do not mash tint into the skin.
• Correct the outline right awaywith a cotton bud if product drifts outside the shape.
• Start your timer as soon as the first brow is completeso your processing time stays consistent.
This video can help you picture the rhythm and hand placement before you begin.
Timing changes the finish. A longer processing time can give sparse or very light brows more visibility, but it also increases the chance of a flat, over-solid front. That trade-off matters even more if you use retinoids, exfoliating acids, acne treatments, or brightening products near the brow area, because skin that is already reactive can grab color faster than expected.
I tell clients to judge fullness by the hairs, not by the stain on the skin. Skin stain can look appealing for the first hour, then turn patchy or artificial once you wash your face and the surrounding skin settles.
A phone timer helps more than people expect. One extra minute can be the difference between soft definition and a boxy brow.
Removal matters as much as application
When the timer ends, remove the tint with a damp cotton pad using gentle, controlled wipes. Avoid rubbing back and forth. Friction can irritate the skin and blur the clean edge you just created.
Check both brows in natural light if you can. If one area looks slightly deeper, let the brows dry fully before deciding whether anything needs adjusting. Fresh tint often looks stronger on damp skin, especially on sensitive or recently treated complexions.
Aftercare and Troubleshooting Common Tinting Mishaps
You rinse the tint, glance in the mirror, and the brows look stronger than expected. That moment is common. Fresh tint often reads darker on clean skin, and sensitive skin can hold a little surface stain for the first day.
•
The first day after tinting
Treat the brow area gently for the next 24 hours. The goal is simple. Let the color settle on the hair while giving the skin time to calm down.
Keep these habits in mind:
• Go easy on water and steam because long hot showers, saunas, and sweaty workouts can shorten the life of the tint
• Skip oil-heavy cleansers and balms on the browsbecause they break down fresh color faster
• Avoid rubbing, scratching, or scrubbing because the skin around the brow is thin and easy to irritate after tinting
• Hold off on brow pencils, gels, and pomades unless you truly need them
If you use retinoids, exfoliating acids, benzoyl peroxide, prescription acne products, or pigment-correcting treatments, keep them away from the brow area for a day or two. I give that advice often in treatment rooms because skin that is already being corrected can become red, sting, or shed unevenly after a home tint.
If the tint looks too dark
Do not try to strip it right away.
Brows usually soften after the first cleanse and once the skin is fully dry. If the color still feels too deep the next day, use gentle cleansing and light exfoliation around the area, not aggressive rubbing over it. Avoid peroxide, bleach, strong exfoliating pads, or brightening products near the eyes. Those shortcuts create a bigger problem than a dark brow.
A soft result ages better than a rushed correction. If you repeatedly end up too dark, switch to a lighter shade next time or shorten the processing time rather than trying to fix it afterward.
If the skin is stained or the result looks uneven
Skin staining usually fades faster than people expect. Leave it alone, wash the area gently, and let the stain wear off naturally. Picking at the skin, layering more tint, or applying random corrective products can trigger irritation, especially if you are already prone to sensitivity.
Patchiness usually starts before the tint ever goes on. Oil, leftover makeup, skincare residue, or uneven saturation are the usual causes. That is why prep matters so much.
Problem
What usually caused it
Safer response
Too dark overall
Shade too deep or processing too long
Let the brows settle, then cleanse gently and reassess the next day
Dark front of brow
Tint stayed longer at the inner brow
Let it fade naturally before making any adjustments
Skin staining
Barrier placement was uneven or product touched the skin outside the brow shape
Clean gently and give it time to lift
Patchy result
Oil, makeup, or uneven product placement
Improve prep next time instead of reapplying immediately
If you want longer-lasting definition without repeating home tint corrections, professional permanent brow options in Indianapolis may make more sense, especially for sparse brows or clients with reactive skin.
Brows should frame the face, not announce themselves. If the result feels bold on day one, wait before correcting. Patience usually gives the most natural finish.
As noted earlier in the safe brow tint correction guide, gentle correction is safer than harsh at-home lightening. That approach protects both the brow hairs and the skin underneath.
When to See a Professional Esthetician in Indianapolis
DIY tinting isn't the best choice for everyone. Convenience matters, but so does your skin history.
•
Who should skip DIY brow tinting
Book a professional instead if any of these apply:
• You have reactive skinand frequently flare after cosmetic products
• You have rosacea, eczema, or acne near the brows
• You're using advanced skincare treatmentsand you're not sure how the area will respond
• You want shaping and tinting together, not just color
• You've already had a reactionto brow tint products in the past
For clients with sensitive or reactive skin, DIY tinting carries more risk. In humid Midwest climates like Indiana, reactions can be harder to calm, and professional studios can usepre-tint LED therapy or post-tint cold plasma to reduce irritation by up to 85% compared to home care alone, according to this reactive-skin brow care reference.
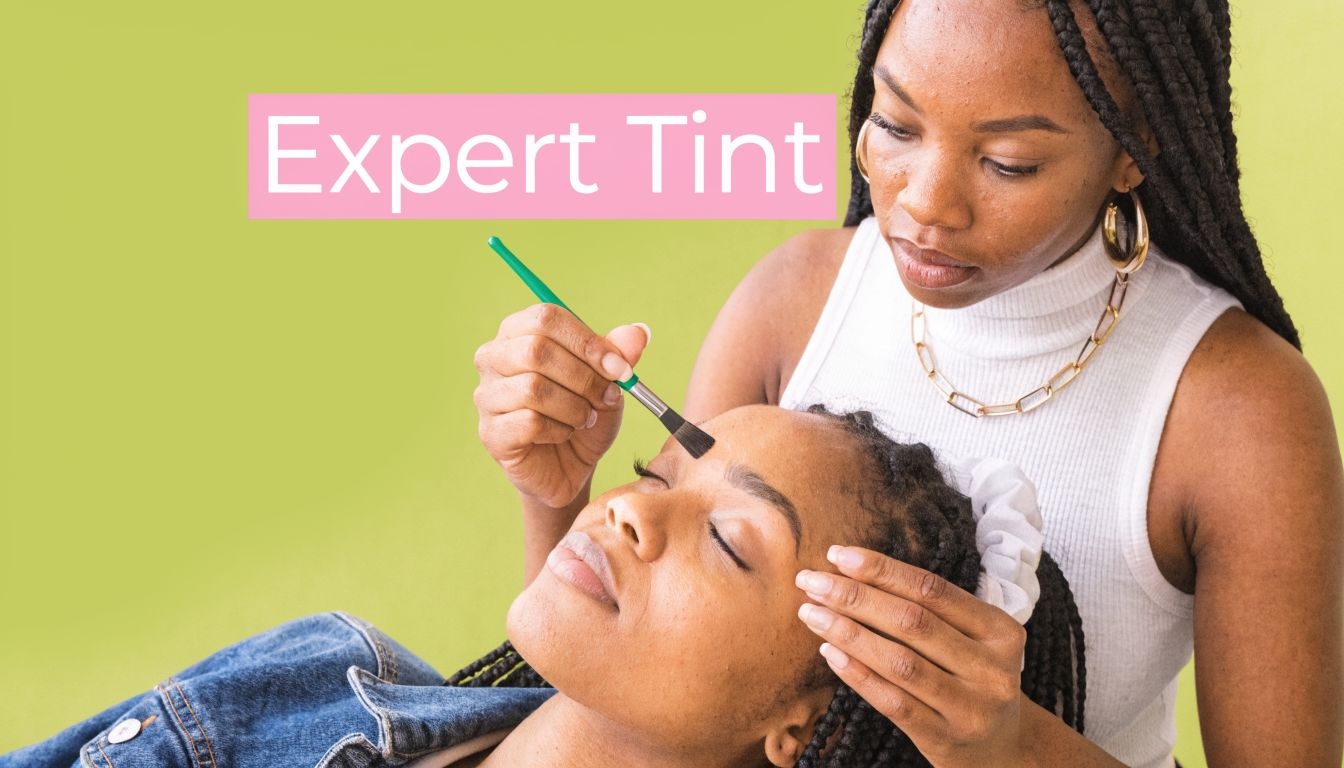
Why professional care makes sense
A professional esthetician can adjust the shade, control the shape, and watch the skin in real time. That matters when your goal is polished but believable. It matters even more when your face is already part of a broader corrective skincare plan.
If you're also considering longer-term brow enhancement, compare your options with permanent brows in Indianapolis.
For many clients in Greenwood and Indianapolis, the best route is simple. DIY works for low-risk maintenance. Professional care is the better choice when skin sensitivity, symmetry, event prep, or advanced results are part of the picture.
Frequently Asked Questions About Home Brow Tinting
Can I use regular box hair dye on my eyebrows
No. Use a product intended for eyebrow tinting, not standard scalp hair dye. The brow area is too delicate to take shortcuts with the wrong formula.
How long do tinted brows usually last
Results vary by product, hair growth, cleansing habits, and skin type. Some kits are designed to last for weeks, but how long your brows stay defined depends a lot on your routine and how carefully you handle the area after tinting.
How often should I tint my brows at home
Retint only after the previous color has faded enough that you need it. More frequent isn't always better. If your skin is easily irritated, give the area more recovery time and choose caution over routine.
What if I have sensitive skin
Be conservative. Patch test first, prep carefully, and skip DIY if your skin has a history of reacting around the brow or eye area. Sensitive skin usually does best with more professional oversight, not more experimentation.
Should I tint right after exfoliating or using active skincare
That's usually not a good idea. If the skin feels dry, tight, recently exfoliated, or visibly irritated, wait until the area is calm again. Brow tinting works best on intact, settled skin.
Why did my tint come out uneven
Uneven results usually come from one of three things. The brows weren't fully cleansed, the product wasn't applied evenly, or the timing wasn't controlled well. Fix the process before trying to deepen the color again.
If you'd rather have expert help than trial and error, A Touch of Claridy offers personalized esthetics care for clients in Greenwood, Indianapolis, and surrounding areas. Whether you want guidance on brow tinting, support for sensitive skin, or a broader plan for non-invasive corrective skincare, book an appointment and get a customized approach that prioritizes natural-looking results and skin health.
•


Licensed esthetician
Clara D-Smith
About Clara
Let me introduce myself if you don't know me, I'm Clara. Wife, mom, aesthetician, makeup artist (special Occasion and permanent), and business owner.
Married to a wonderful man named Michael whose blessed me with three beautiful children! Elijah, Micaiah and Eliana. Yes busy, but joyfully loving Life...in abundance.
Always being attracted to beauty and color, I love anything that allows me to be creative, help others and shine! So, let me help YOU shine with almost 20 years of experience in beauty, skincare, makeup and anything I like to "touch".
#atouchofclaridy
of Indianapolis is here for you!
Contact Us
We'd Love To Hear From You

Copyright 2025 A Touch of Claridy